Origami Tutorials
How to Make an Origami Reindeer
This origami reindeer has an orange face and two white antlers that stand out to the left and right. It is folded from one square sheet of paper that has a different color on each side, and you finish it by drawing the eyes and nose with a pen. Every step below has a photo taken from the video, so you can check the shape of the paper as you go.
- Difficulty
- ★★★ Challenging
- Steps
- 33
- Video
- 7:50
- Paper
- 1 sheet, two colors
- Tools
- A pen
Download the printable PDFFree · 4 pages · all 33 step photos
What you need
- 1 square sheet of origami paper with a different color on each side (orange and white in the video)
- A pen for the eyes and nose (the video uses red for the nose)
Step-by-step instructions
-
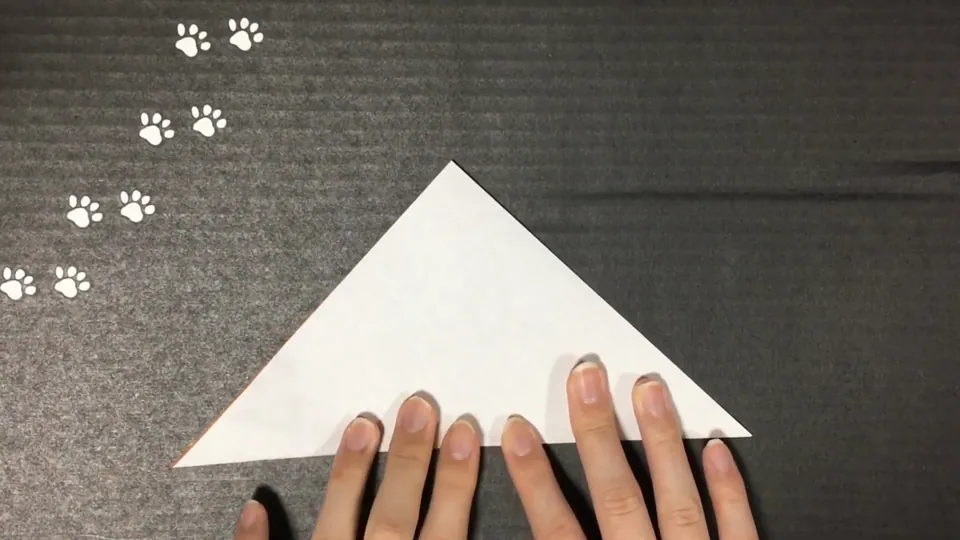
1Fold a triangle
Place the paper colored side up, turned so it looks like a diamond. Fold the bottom corner up to the top corner to make a triangle.
-
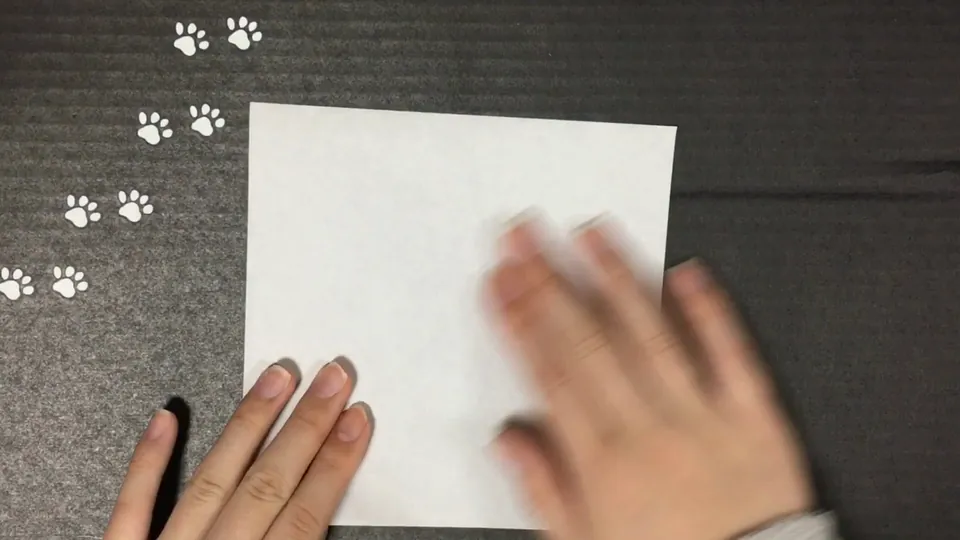
2Unfold and turn over
Open the triangle back into a square with a diagonal crease. Turn the paper over so the white side is facing up.
-
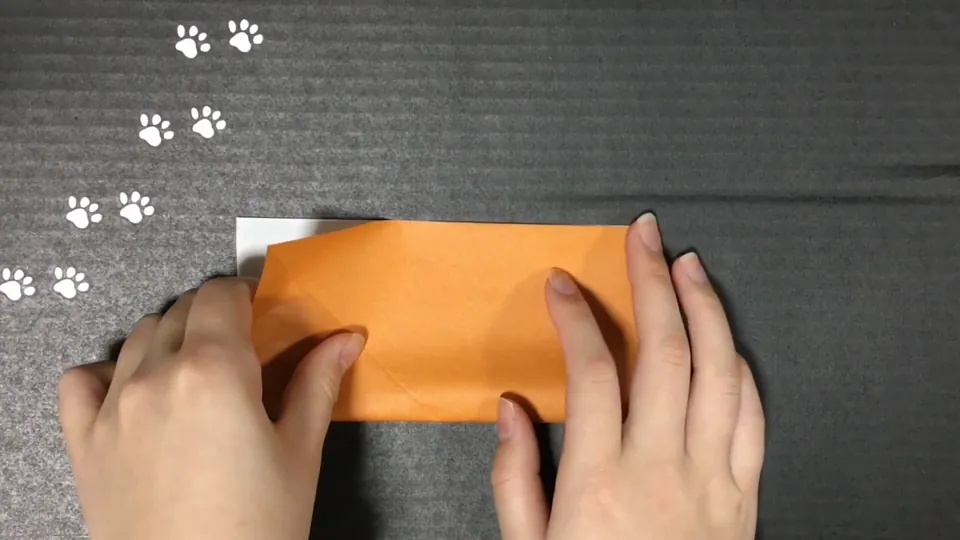
3Fold in half
Fold the bottom edge up to the top edge and press the crease firmly.
-
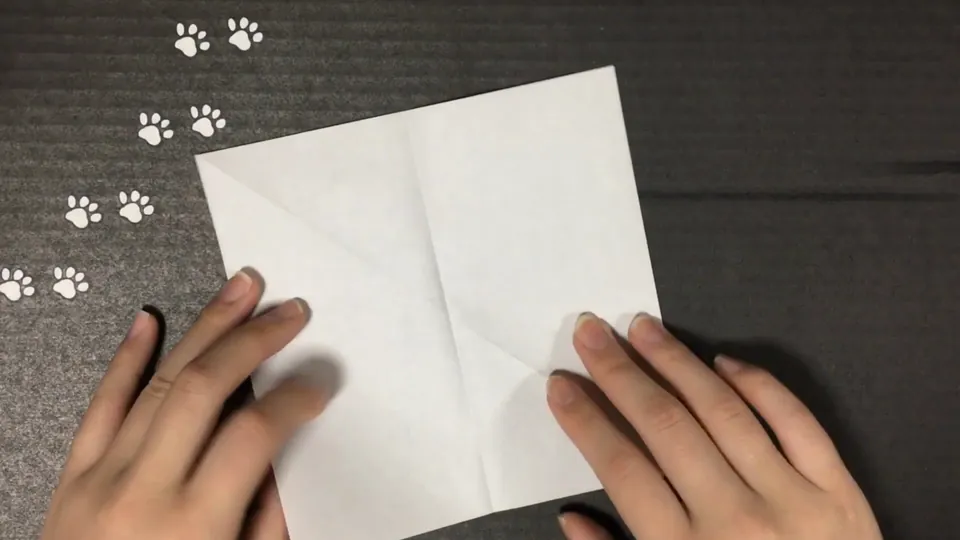
4Unfold
Open the paper again. The white side now has one straight crease across it.
-
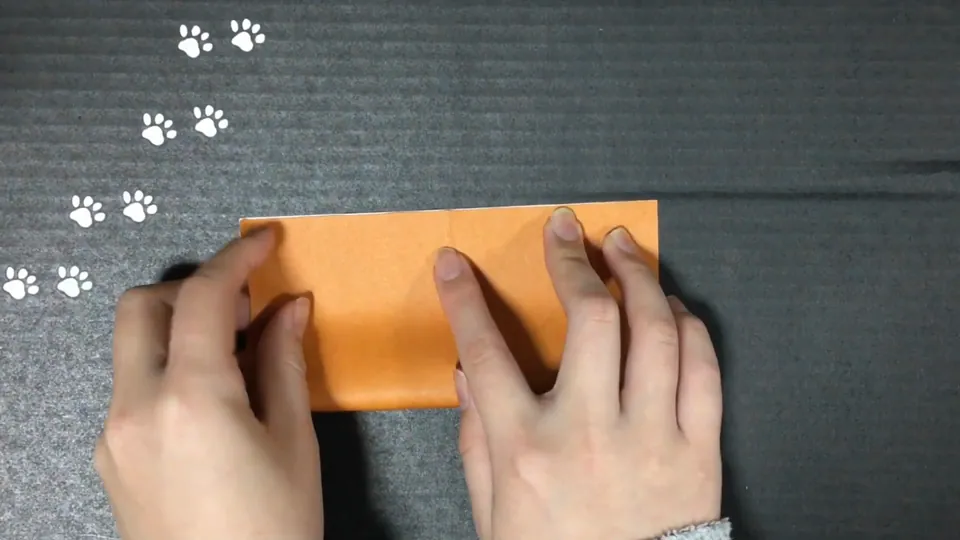
5Fold in half the other way
Turn the paper a quarter turn and fold it in half again to make a second straight crease.
-
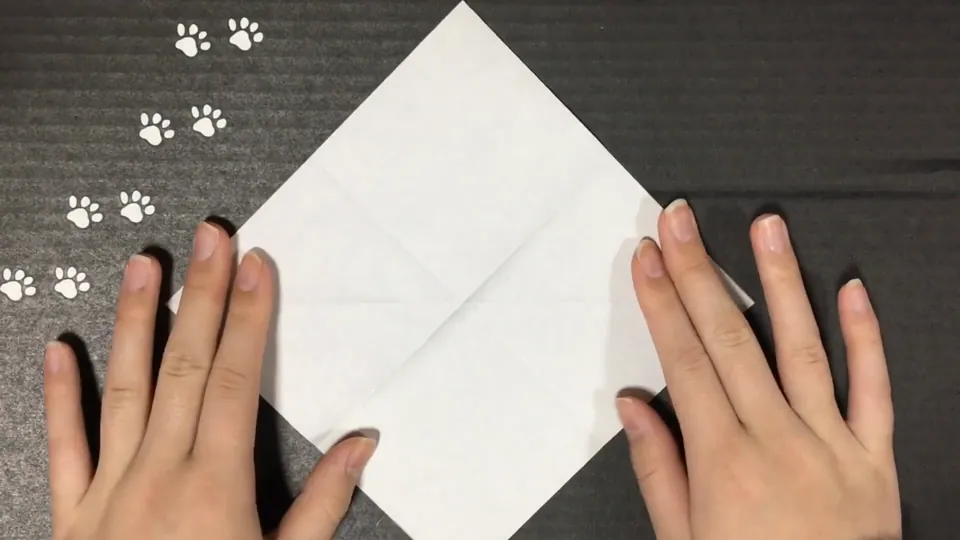
6Check the creases
Unfold the paper with the white side up. You should now see creases through the middle in both directions, plus the diagonal crease.
-
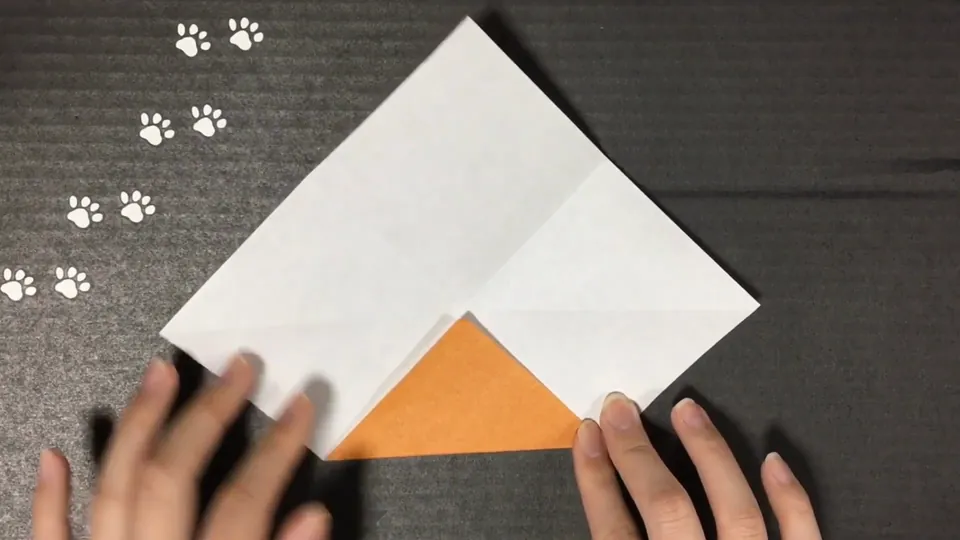
7Fold the bottom corner to the center
Turn the paper so a corner points down. Fold the bottom corner up to the point where the creases cross in the middle.
-
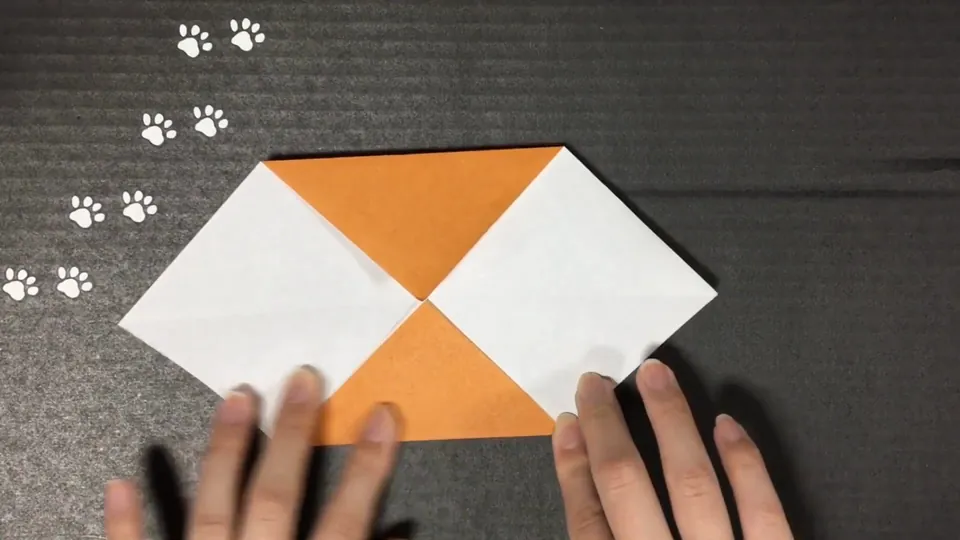
8Fold the opposite corner to the center
Rotate the paper and fold the opposite corner to the center as well. You now have an orange triangle at the top and bottom, with white corners left on the sides.
-
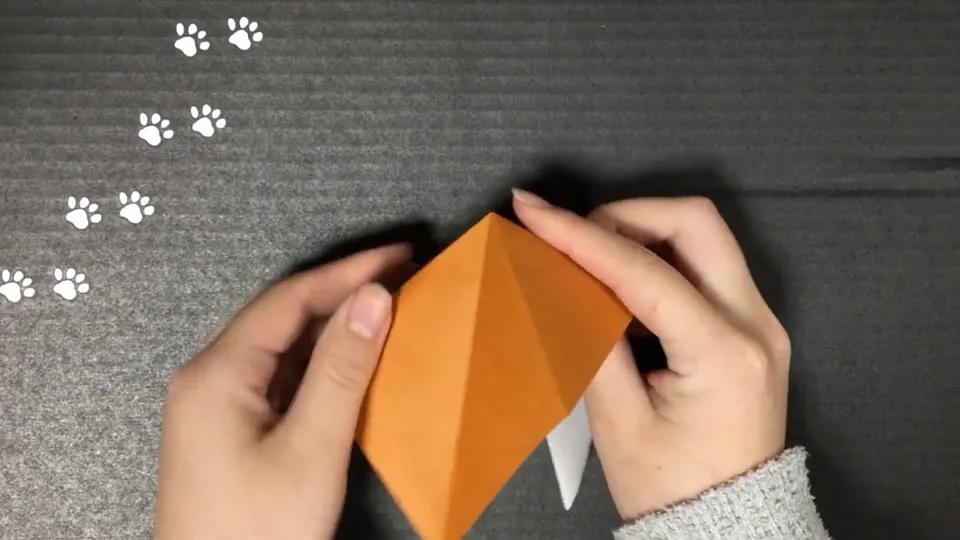
9Bring the sides together and collapse
Hold the white corners on the left and right and bring them down toward the middle while you lift the top orange triangle. Flatten everything along the creases. The white goes inside and the outside becomes a pointed orange diamond.
-
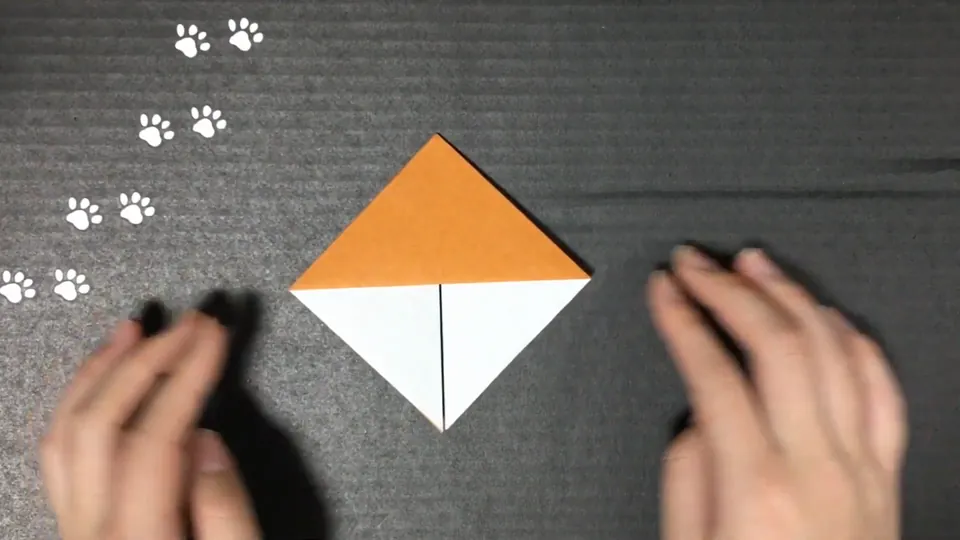
10Open the front layer
Lift the front orange layer upward to show the white inside. The top of the diamond is orange and the bottom is white.
-
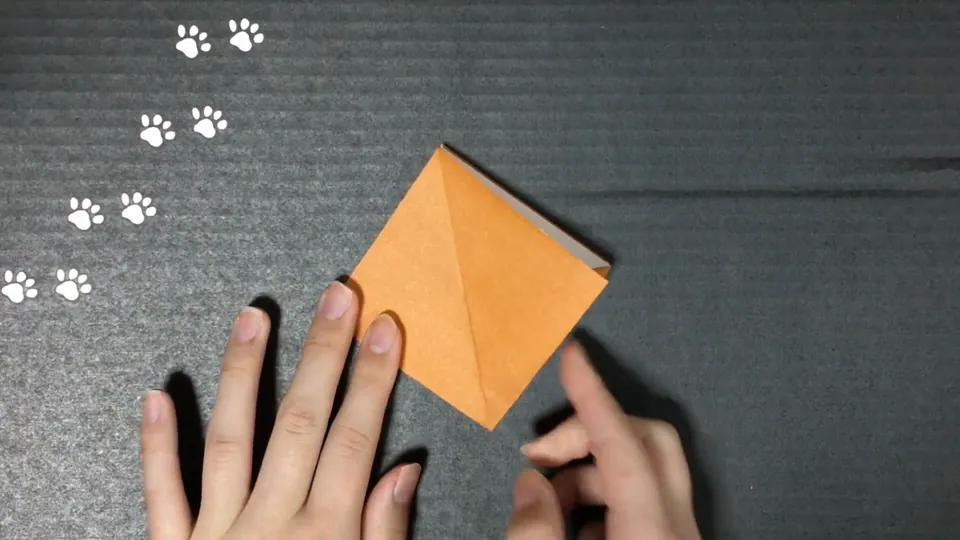
11Turn over and tuck in the white
Turn the model over and fold the visible white part inside, so the whole diamond is orange again.
-
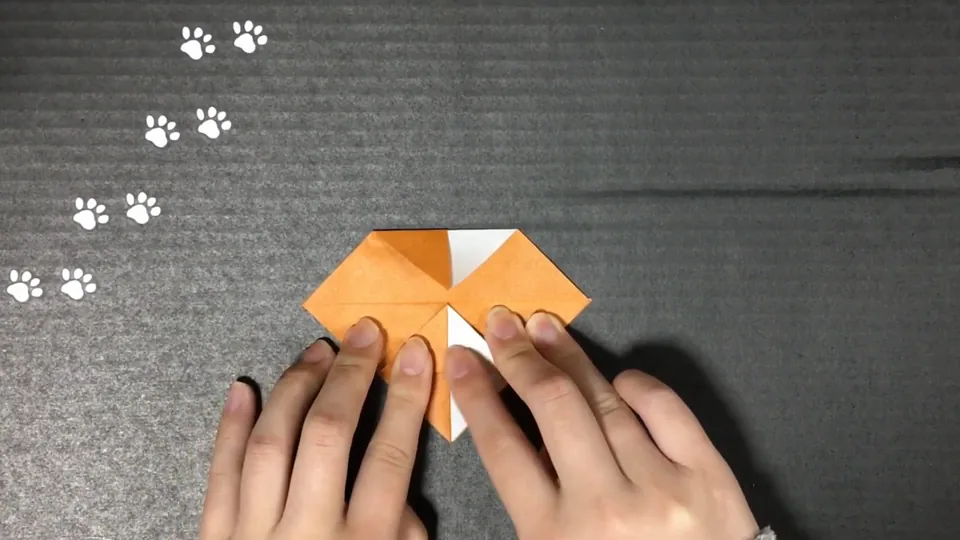
12Open the bottom and side corners
Open the bottom corner and the side corners a little at a time to bring out the small white triangles hidden inside.
-
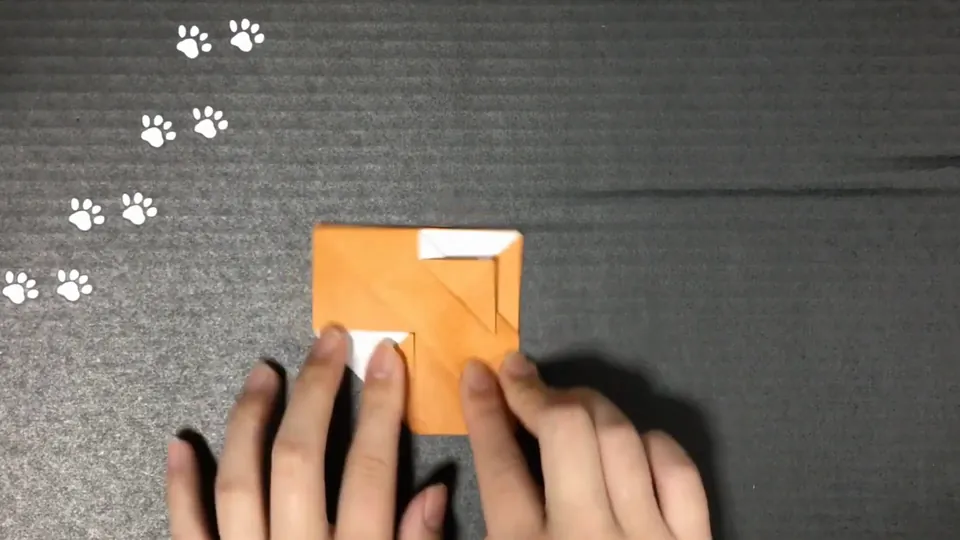
13Swirl the four corners to the center
Hold the small triangles in place and lay all four corners toward the center in the same direction, like a pinwheel, to make a square. Then fold it in half into a triangle so a small white triangle peeks out at the top.
-
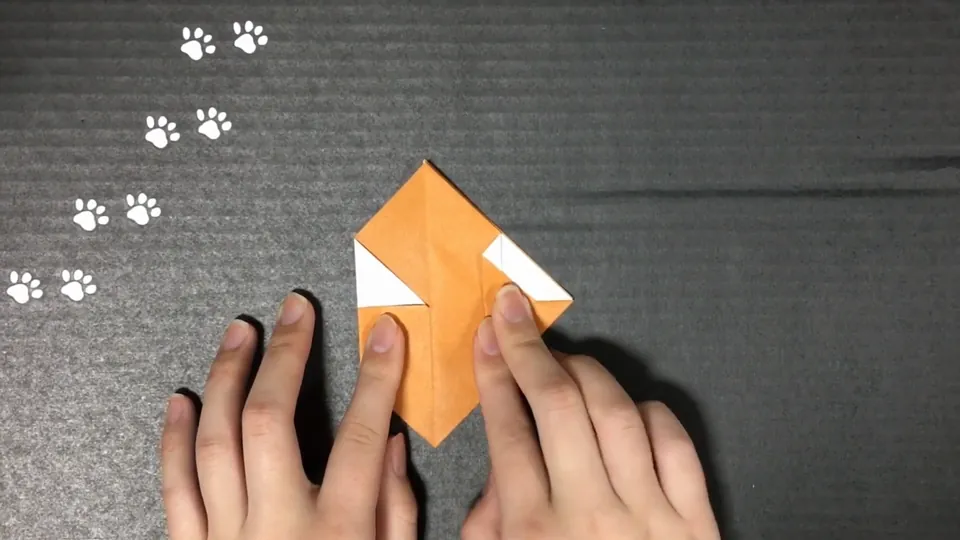
14Shape a diamond
Press the folded paper flat and shape it into a tall diamond with white triangles showing on the left and right.
-
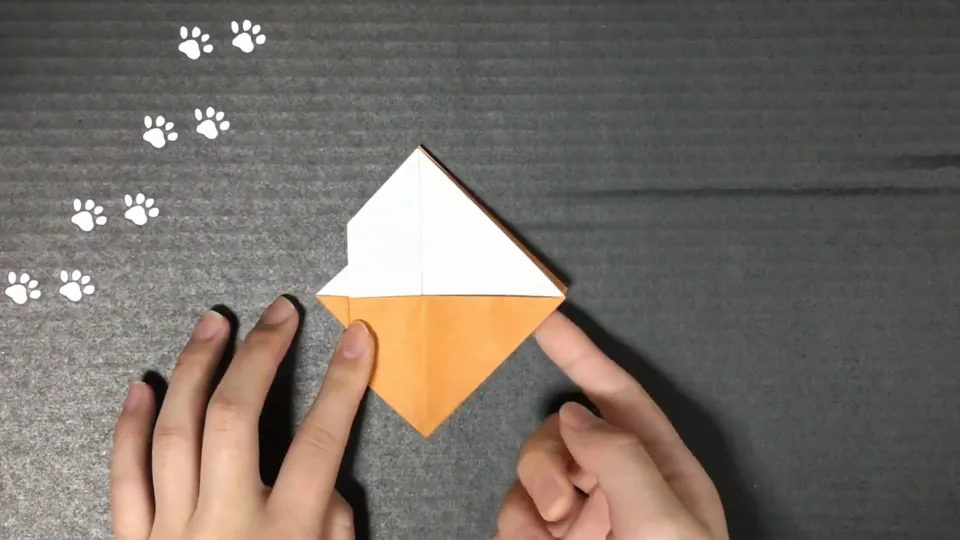
15Open the top to show white
Open the layers near the top to show the white side. The top of the diamond is white and the bottom is orange.
-
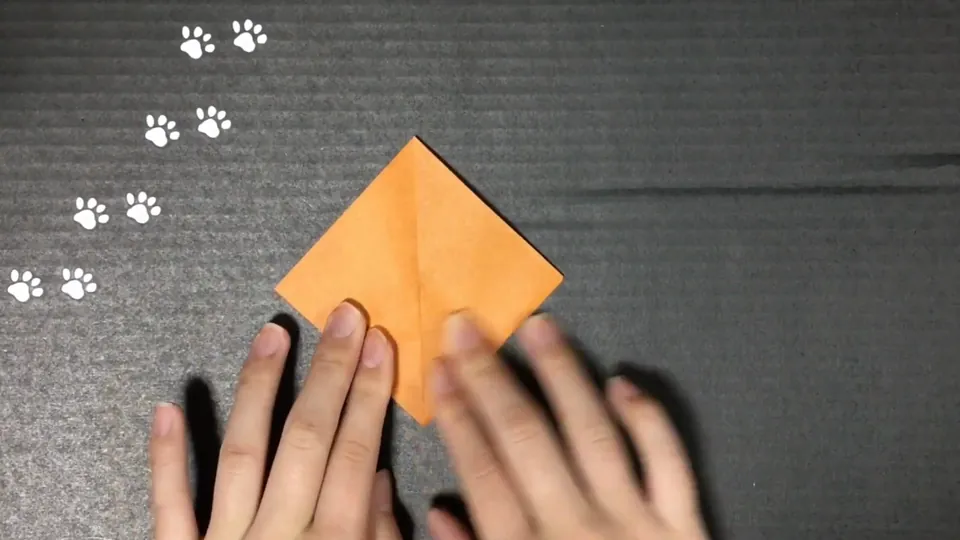
16Go back to the orange side
Fold the white part away to hide it, so the diamond is orange again, and press a crease down the middle.
-
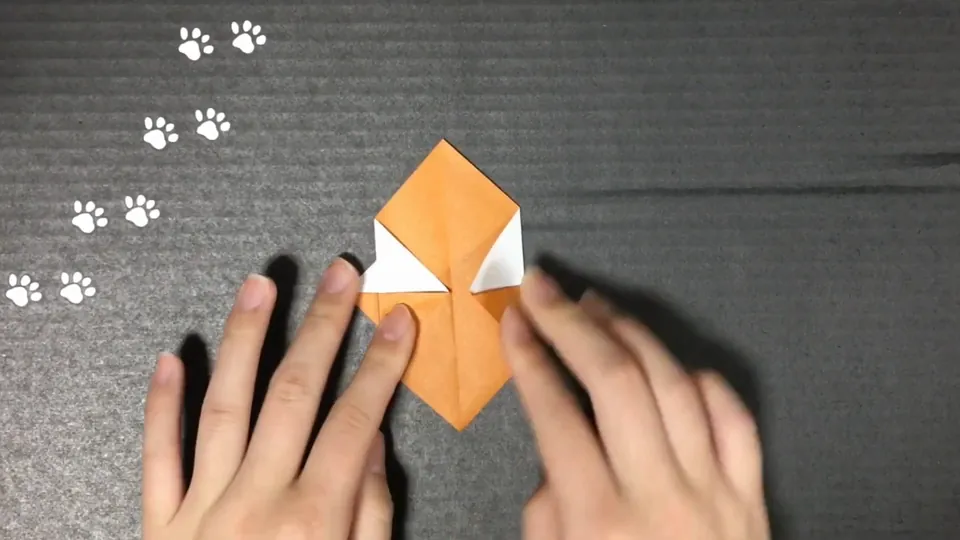
17Lay the corners the same way
Pinch the bottom and side corners of the diamond and lay them toward the center, all in the same direction. The corners overlap like a pinwheel, and a small white triangle shows at each corner.
-
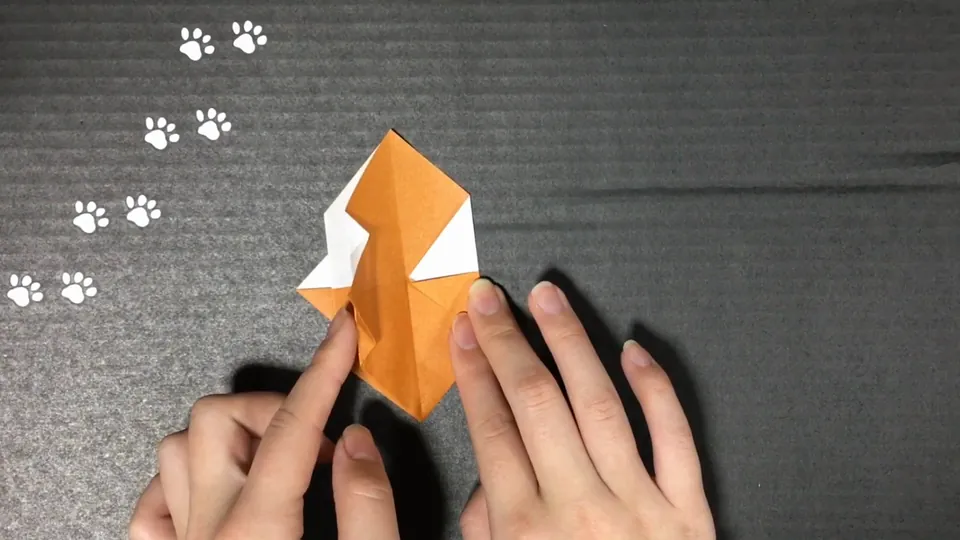
18Flatten and turn the model
Press the folded shape flat and hold it so the orange body is at the bottom and the white part is at the top.
-
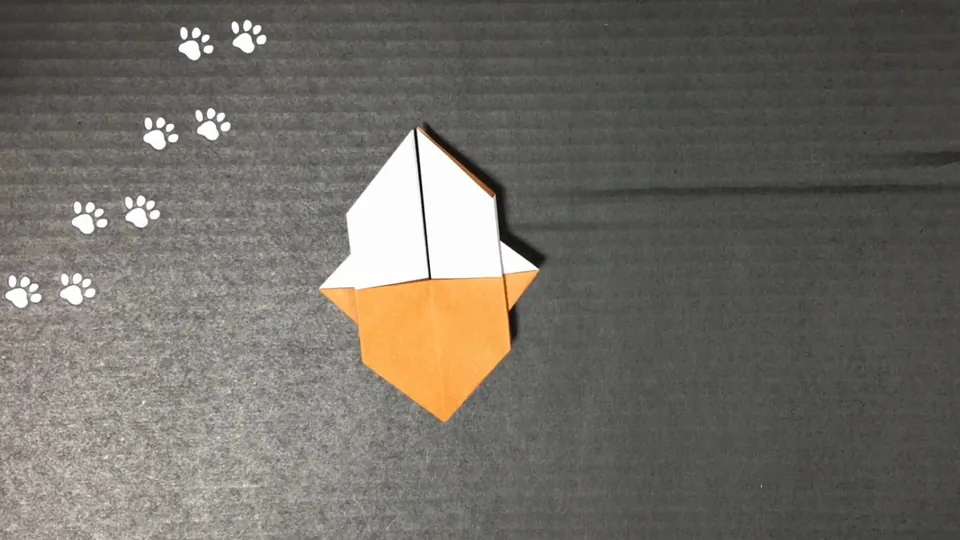
19Shape the head
Press the white part at the top into a triangle so the orange face shows below it. There is a vertical line down the middle of the white part.
-
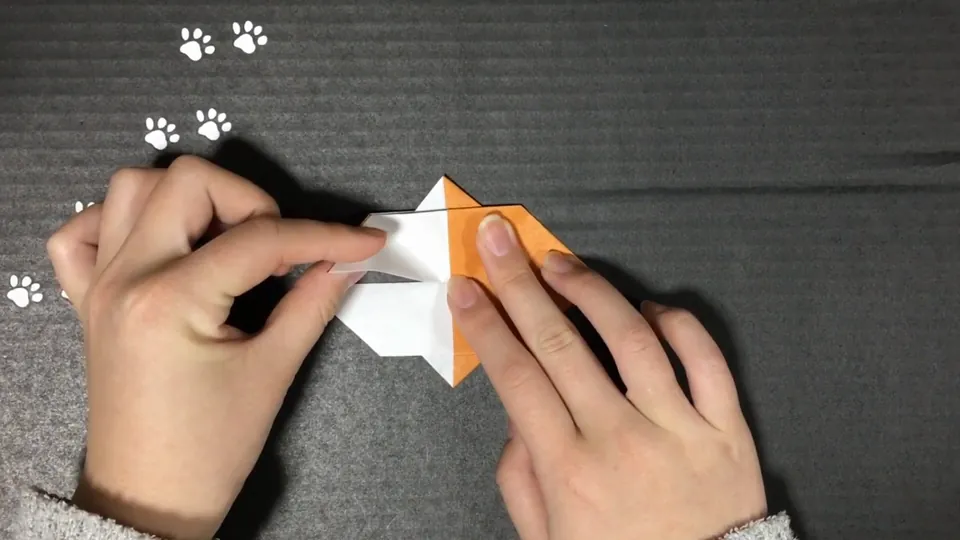
20Spread the white triangle
Open the white triangle at the top to the left and right from the center line. The white paper now reaches straight out to both sides.
-
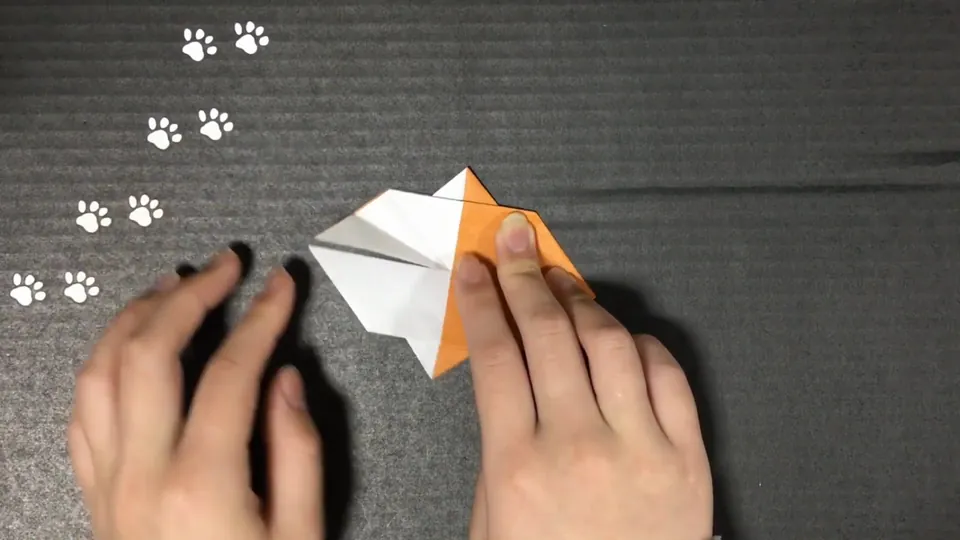
21Fold the left tip into small triangles
Fold the tip of the white part on the left back into a small triangle. Repeat this a few times so the end becomes a stepped, pointed shape. Keep your other hand on the orange part while you fold.
-
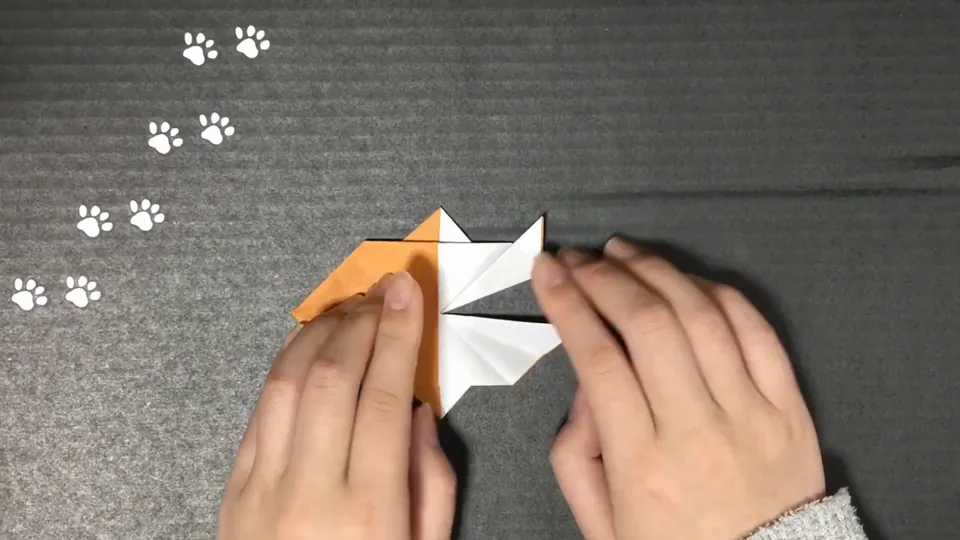
22Fold the right tip the same way
Turn the paper and fold the white part on the other side the same way, folding the tip back into small triangles. You will see two or three pointed steps at the end.
-
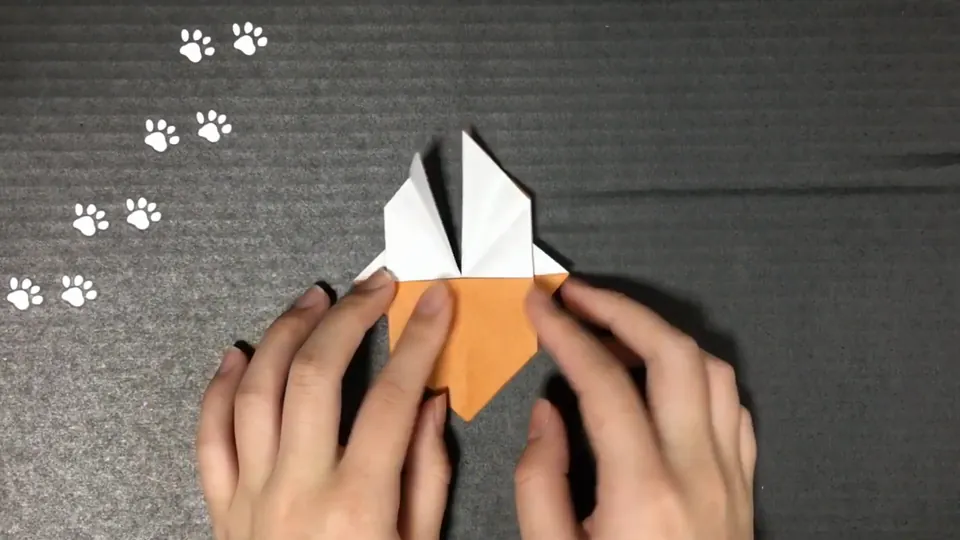
23Stand up the two white pieces
Hold the paper upright. The two stepped white pieces now stand up over the orange part, one on each side.
-
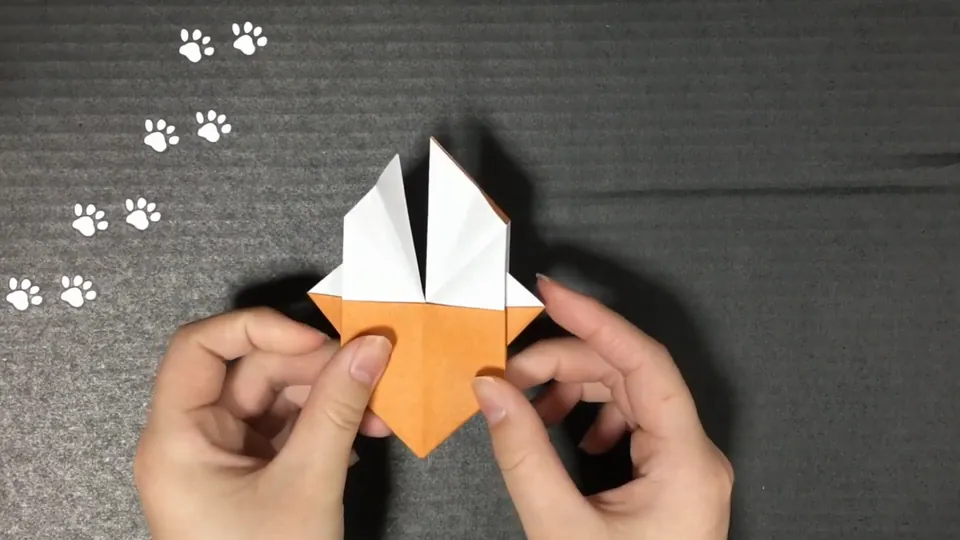
24Adjust the white pieces
Press the base of the two white pieces with your fingers and leave a small gap between them in the middle. The white parts have several diagonal creases, and the orange part is a little wider at the corners.
-
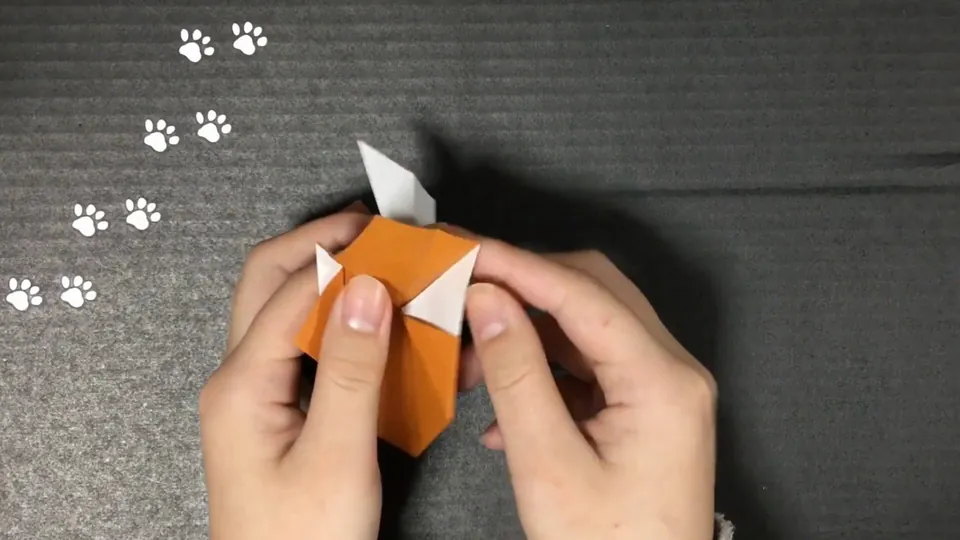
25Turn over and fold the corners
Turn the model over so the orange side faces up, and fold the left and right corners toward the center. A small white triangle shows where you folded, and one white piece stands up as a narrow point.
-
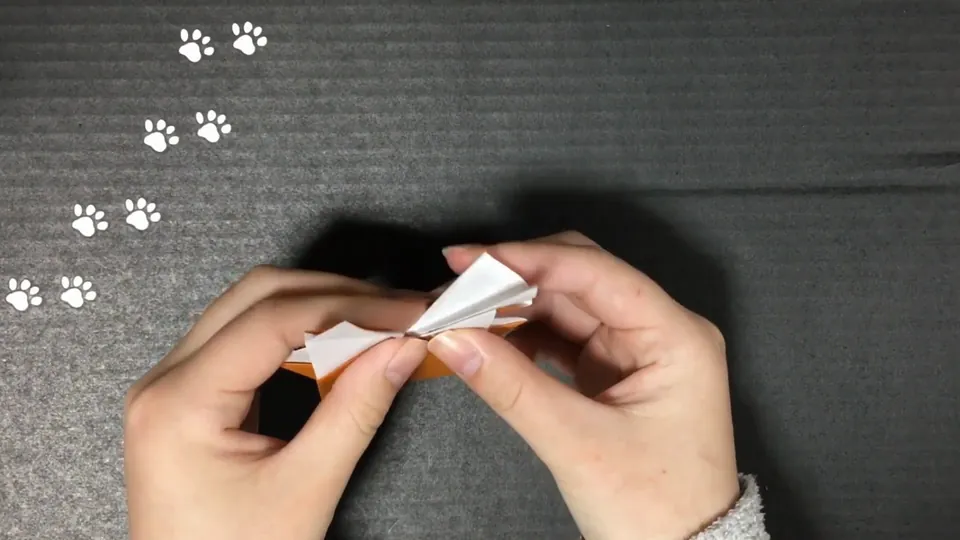
26Pleat one white piece
Turn the model back over. Spread out the white piece on one side and fold it into small accordion pleats. When you finish, the white part fans out.
-
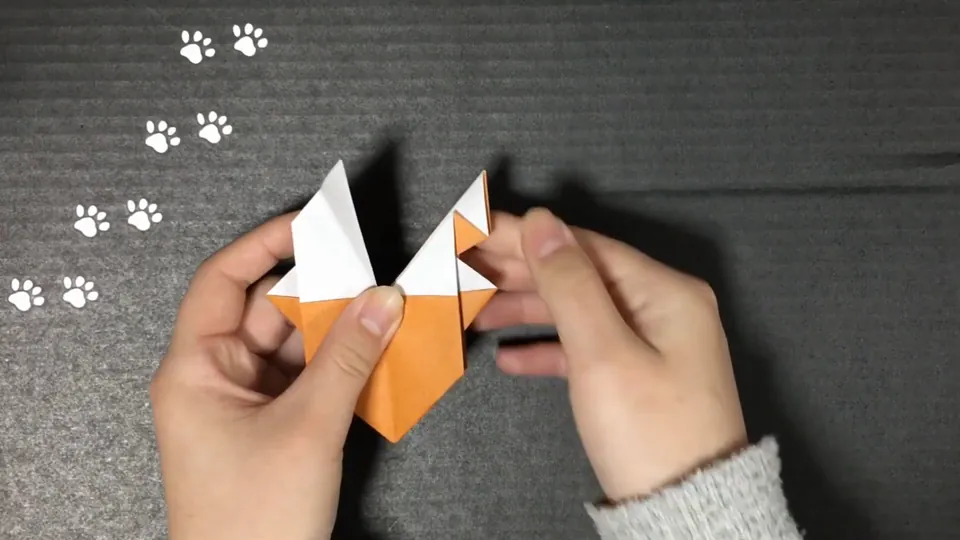
27Fold the other white tip
On the other white piece, fold the base where it meets the orange part. A small white triangle sticks out at an angle, with a small orange triangle at the tip.
-
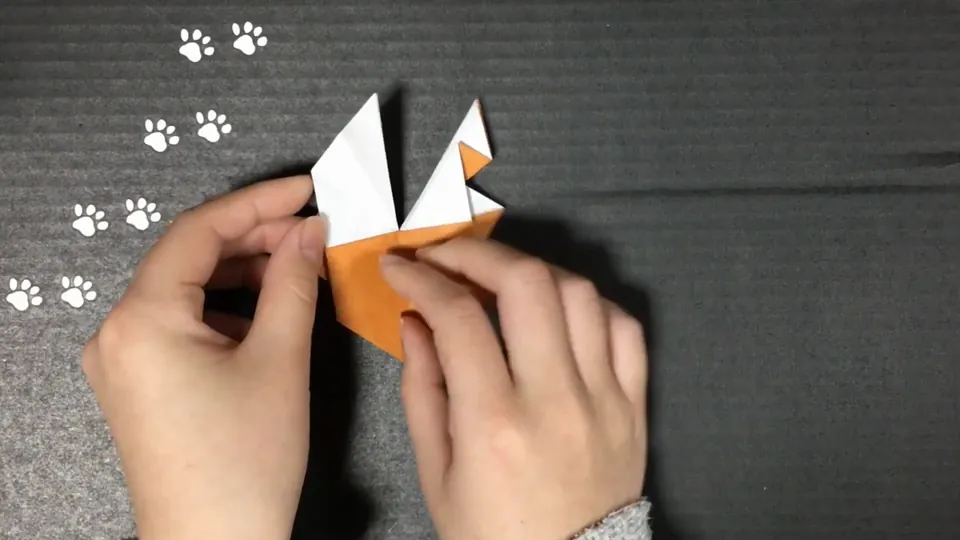
28Crease the orange part in half
Fold the orange part in half lengthwise to make a crease, then open it again. You can see the two white pieces standing on each side, one of them pleated into a fan. Your hands cover the paper at the moment of folding, so watch this step in the video too.
-
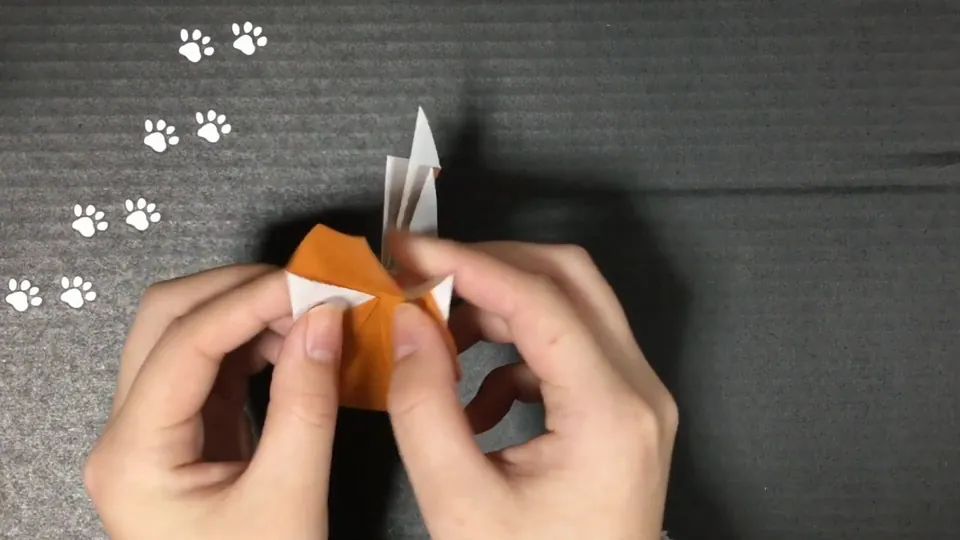
29Turn over and fold the corners again
Turn the model over again and fold the left and right orange corners toward the center. Small white triangles show where you folded, and a thin white strip stands up at the top.
-
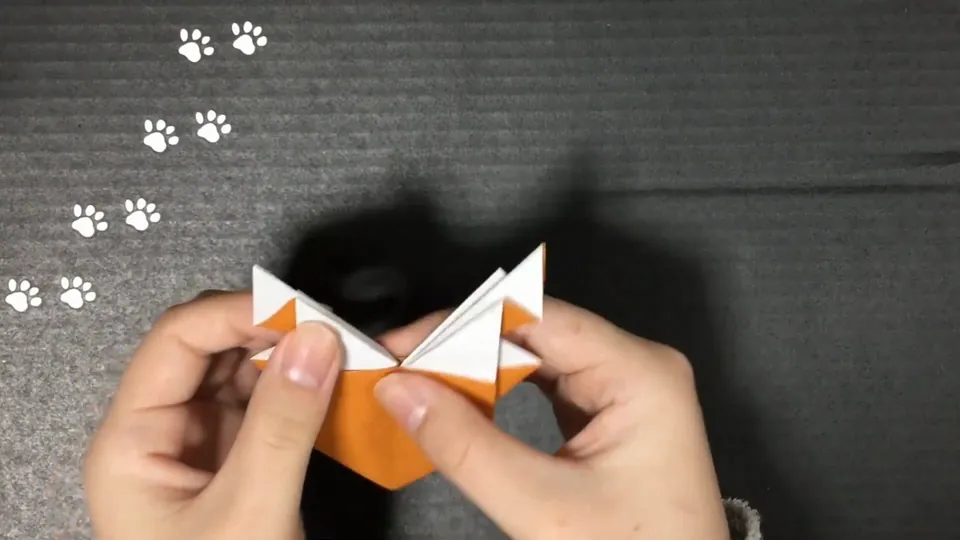
30Pleat the remaining white part
Turn the model face up, spread out the remaining square white part, and fold it into small accordion pleats. Now there is a thin fan on each side, with a small orange triangle at each tip.
-
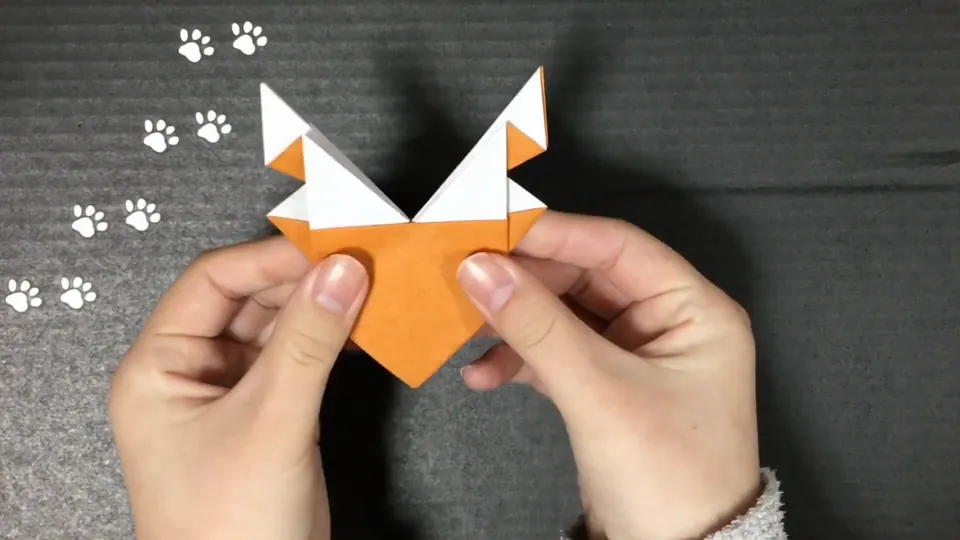
31Spread the antlers
Open the two narrow white pleated parts into a V shape above the face and press them flat.
-
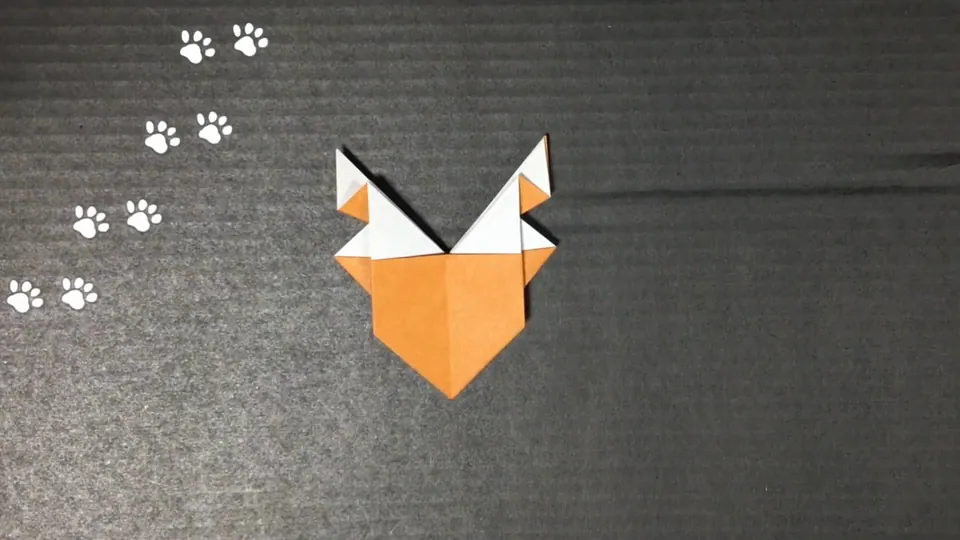
32Even out the antlers
Hold each antler with your fingers and make them the same height and angle. Now the reindeer face has white antlers standing up on both sides.
-
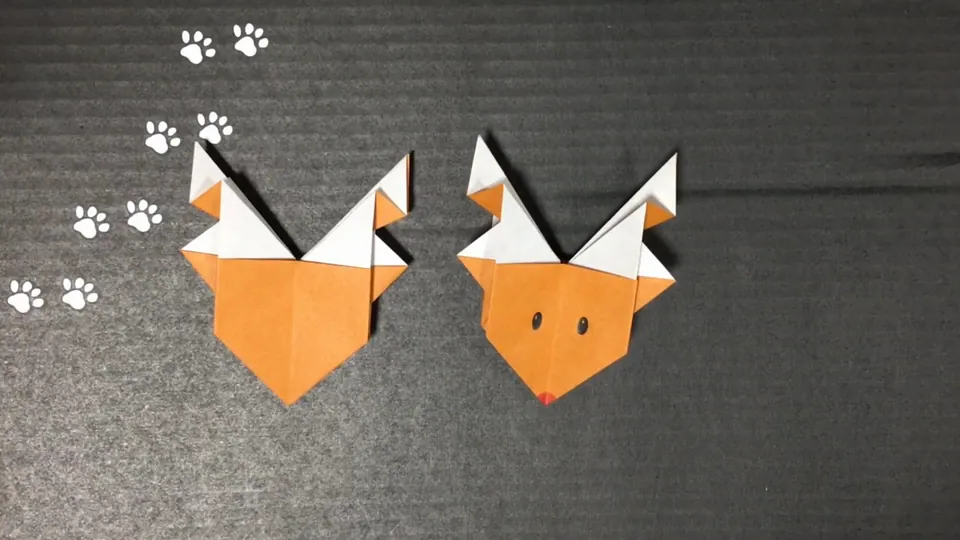
33Draw the face
Use a pen to draw two eyes, then color the nose red. Your origami reindeer is finished.
Finished reindeer
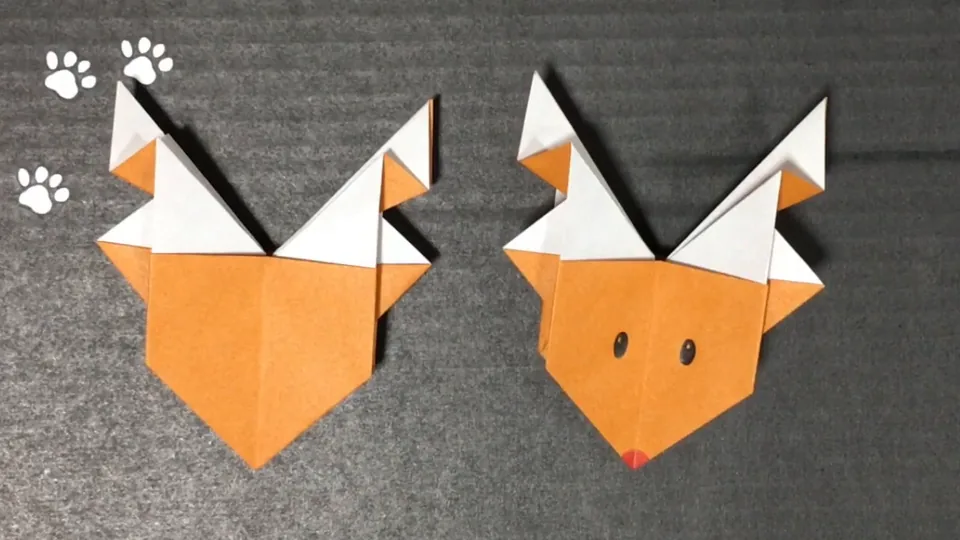
Here is the finished reindeer, with white antlers and a hand-drawn face. Try it in other colors too, like brown and white, for a whole team of reindeer.
Download the printable PDFPrint it out and fold along with the photos.
Tips
- Make the first creases sharp. They guide almost every fold that comes after, so the collapse in step 9 is much easier when the creases are crisp.
- Pinch the tips of the antlers so both sides end up the same shape. When the antlers match, the face looks neat and balanced.
- Steps 21 to 31 fold small layers. If the paper starts to bulge, press each fold flat before moving on.
FAQ
What paper do I need for an origami reindeer?
One square sheet of origami paper with a different color on each side. In the video, one side is orange for the face and the other side is white, which becomes the antlers.
Is this origami reindeer easy?
It is not a beginner model. There are 33 steps, and the antlers are made by folding small layers into pleats. If you are new to origami, follow the video alongside the photos.
Can I print these instructions?
Yes. Download the free printable PDF from this page. It has every step photo, and a QR code that brings you back to this page and the video.